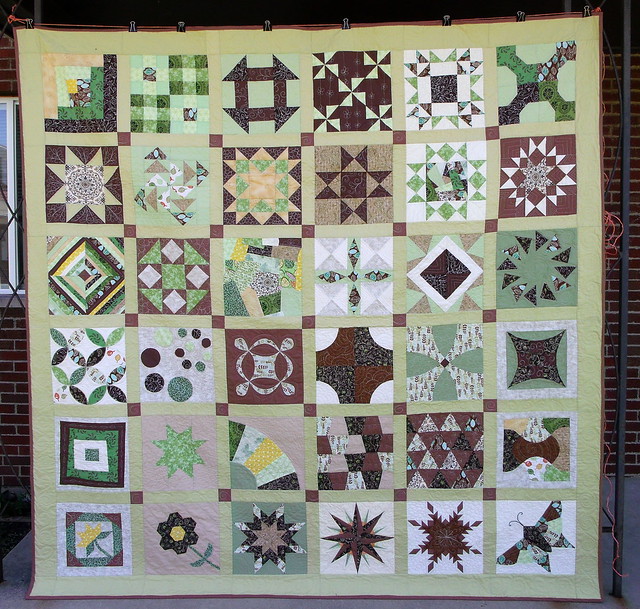
One day a few years ago, I decided I was going to learn to quilt. I had wanted to for a while, but I was a little intimidated. I had done some reading about it but hadn’t actually tried it. Then I saw a link to the We Can Do It! Skill Builder Sampler, which had started not long before, and it looked really approachable. I decided to give it a try.
I got sidetracked a few times. Early on I made about five blocks before bad ergonomic setup got the better of me, and it took a while to get that sorted out. In the end it took me close to three years to finish, but it’s finally done. (I actually finished it about 10 days ago, but I’ve been sidelined by some sort of plague that rolled through my household and by my cat’s surgery and still-in-progress recovery, and I’m just finally finishing up the post now.) It’s technically not my first quilt, I guess, since I finished a wall-hanging sized quilt last summer, but as far as I’m concerned this is my first one since I started it first and since it was a pretty huge undertaking. It’s queen size, finishing at 90 inches square.
I learned a ton of new skills doing this. How to use a rotary cutter, how to sew a scant quarter inch seam (my mastery of this one is debatable some days), how to press seams accurately. Strip piecing, chain piecing. Half-square and quarter-square triangles and flying geese and that nifty flippy corner piecing thing that I still don’t know the name of. Foundation piecing, using both paper and fabric foundations. I discovered that improvisational piecing about gives me hives — maybe I’ll change my mind someday, though. I did a bunch of different kinds of applique — raw edge using fusible web, freezer paper applique, and needle turn applique, which I want to practice some more since I still haven’t got the hang of it. Curved piecing, piecing with templates, inset seams. English paper piecing, which I love so much that I’ve started a queen size EPP quilt.
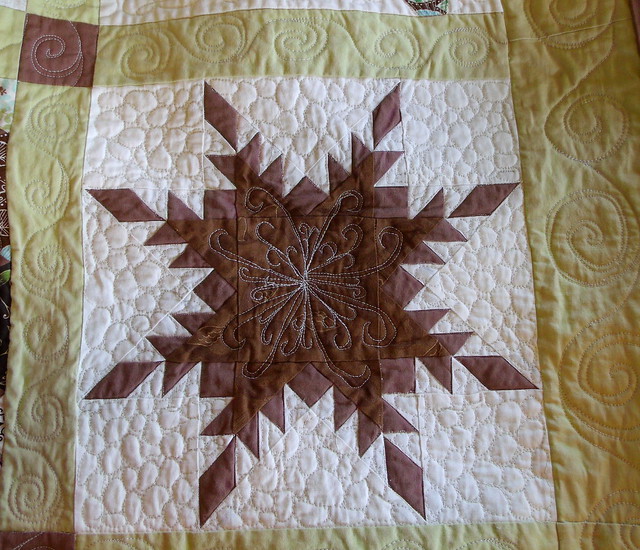
It was challenging, but the sampler progressed in such a way that I was pretty much always ready for the next thing. I screwed up a lot, had to rip seams and do them over, had points that didn’t match, did the applique stitching on the circles block completely wrong — they’re stitched down with sort of a demented whipstitch because I misunderstood the instructions). At one point I became so unnerved by the feathered star block that I procrastinated for months.
There are a ton of mistakes, and it’s completely awesome anyway because I finished it and I made the whole thing by myself. And most of the mistakes aren’t all that noticeable from a few feet back.
It’s not a quilt until it’s quilted, right?
The whole time I was working on piecing the quilt, I felt a little nervous at the prospect of quilting it. It sounded entirely foreign in a way that piecing didn’t — I already knew how to sew before I started, but free motion quilting sounded more like alchemy than sewing. I needed more help. I enrolled in a couple of Craftsy classes, Quilting Big Projects on a Small Machine and Free Motion Quilting a Sampler. I found them both incredibly helpful.
I also did a practice FMQ project beforehand to get at least a little bit of practice before tackling the quilt.
Craftsy Classes & A Really Helpful Book
Quilting Big Projects on a Small Machine is taught by Ann Petersen, and I really enjoy her teaching style (so much that I’ve enrolled in another one of her classes). She’s informative and reassuring, and after watching the first few lessons I already felt better about trying to tackle a queen-size quilt on a domestic machine. The lessons cover design, getting ready to quilt, working on whole quilts, working on split batting quilts and split top quilts, a block by block quilt-as-you-go method, and medallion quilts.
I still haven’t watched all of the medallion quilts lesson yet (and have only watched the split batting, split top, and block-by-block lessons) since I was focusing on doing a while quilt at once, but I want to try some of the other methods, too. I keep imagining that quilt-as-you-go might be tedious, but plenty of times I’ve tried out something that sounded tedious (like English paper piecing) and found that I loved it to the point of distraction, so I definitely want to try out some of the other methods presented.
This class is where I got the idea to use pieces of rubber shelf liner/rug backing to grip the quilt with instead of gloves, and that worked out really well for me. I also tried a pair of gloves with grippy fingers but found them awkward, and I kept having to take the gloves off to deal with threads and such. I know the specialty quilting gloves are sometimes made so you should be able to thread the needle with them on, but I probably won’t try them anytime soon since the shelf liner squares worked beautifully.
Free Motion Quilting a Sampler, taught by Leah Day, focuses on quilting the sampler from the free 2012 Craftsy Block of the Month class, and I figured it would be helpful in deciding how to approach quilting my sampler. The first four lessons cover basting (she covers pin basting, and the Ann Petersen class covers spray basting); basics/supplies including info on how to modify a universal free motion foot if you need to and advice on machine settings, FMQ basics, and a lesson on speed and motion where she has a new quilter get started; and stitching in the ditch and hiding threads. She demonstrates free-motion ditching, which is what I used on the quilt. (Mine was very wobbly at first but got a lot better by the end, and I liked not having to use my walking foot, which is a universal one that I tend to have stitch length issues with.) She really encourages not ripping all the little imperfections because spending all that time ripping only gets you better at ripping instead of better at quilting.
The lessons then move into various free motion patterns used to fill the different sampler blocks: stippling, paisley, spirals, wandering clover, shells, squares, pine needles, pearls, pebbling, escargot, square spiral, snake paisley, feathers, spiral chain, desert sand, and feather fans, followed by a lesson on quilting the border and finishing. All of these lessons have tons of good advice mixed in with them. I haven’t actually gotten through all of them yet — I mainly used the designs from lessons 5-7, combined with the designs from First Steps to Free Motion Quilting. The class materials download has sketches of all the designs and also a sketch of the entire sampler filled in with the designs she used, which I found really helpful in deciding how to quilt a few blocks that I kept dithering about. I never found the fact that I was quilting an entirely different sampler than the instructor to be a problem — all the advice transferred to my quilt just fine.
I never did modify my foot the way she suggested in the beginning of the class. She suggests modifications to a universal quilting foot (which is what I have) to both stop it from hopping, which she finds problematic, and to open the oval area that the thread passes through to make it easier to see what you’re doing. I didn’t find the hopping all that noticeable (but the way the foot attached to my Singer 15-91, which I used for quilting, was nowhere near as dramatic as the amount of hopping I got the same foot on my Morse). I do want to remove part of the plastic oval as she suggested, but I didn’t do it before getting started, and once I got started I didn’t want to risk breaking my only free motion foot in the middle of quilting. I’m going to give that a try before I quilt another big project — I think it’ll both make for better visibility and save the annoyance of having to thread through that ring whenever I re-thread the machine.
I also bought a copy of First Steps to Free Motion Quilting by Christina Cameli (who also blogs at A Few Scraps.) Besides the video classes, I wanted something I could leaf through while I was quilting. I loved this book. The content is split up into roughly 20-25 pages of free motion quilting basic instruction, 45 pages of quilting designs, 24 projects, a section of basic construction technique info for the quilts and other projects in the book, and a section with troubleshooting guides, which I consulted many, many times while quilting. The troubleshooting guides cover thread breakage, skipped stitches, thread loops on the back of the quilt, needle breakage, bobbin thread showing on the top, thread snarls on the back, and bubbles/puckers in the quilt — I found these really useful. (I haven’t done any of the projects yet since I’ve been all about finishing the quilt lately, but there’s a messenger bag in there that I’m dying to make. I have a thing about messenger bags. I also want to make the fabric bowls and a fabric basket or two, and there are some beautiful quilts in there that are either simply pieced or use mainly a sprinkling of applique to let the quilting take center stage. The Fireworks and Leaves quilts in particular are beautiful.)
Here’s the part where I post a thousand photos
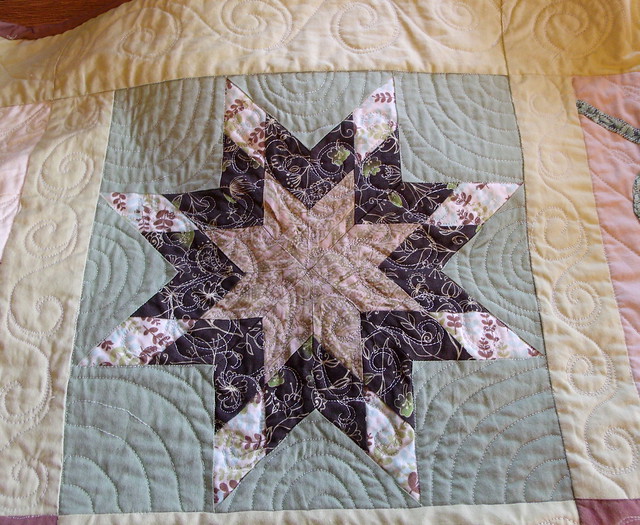
After I did a metric ton of ditch quilting with monofilament, I switched over to cotton thread and quilted each block individually, then quilted in the sashing/cornerstones and the border.
Sometimes I didn’t quite manage to pull off what I was trying to do, like the echoing of the design on the reel block. Here I also kept letting go of the quilt before the needle was down, something I’m still trying to get the hang of doing right.
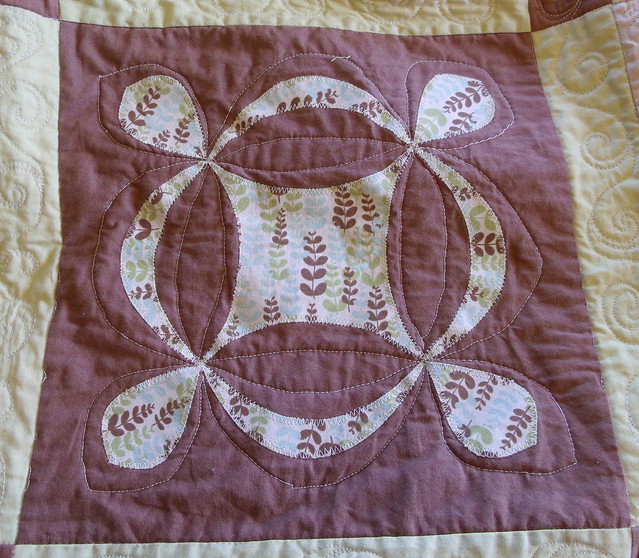
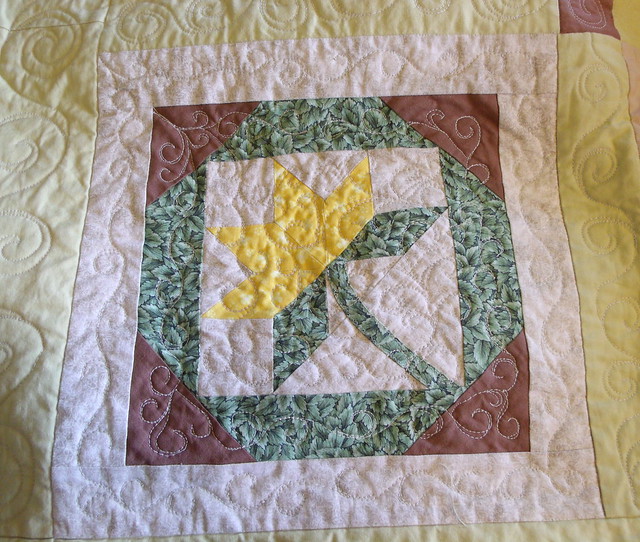
But sometimes I managed to do something that looked pretty nifty.
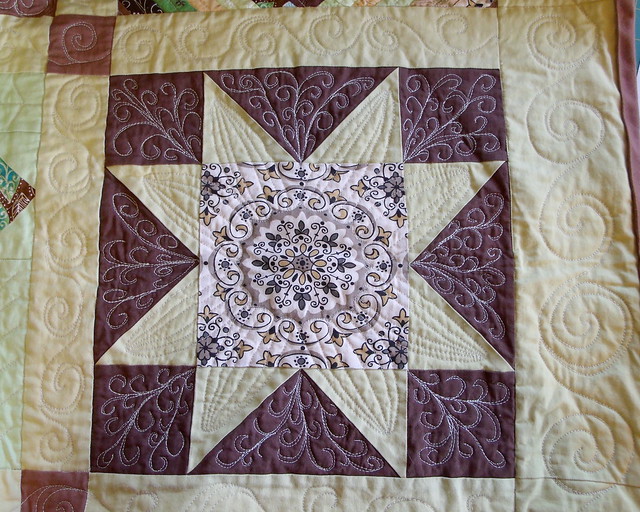
That one has a flower that shows up much better on the back:
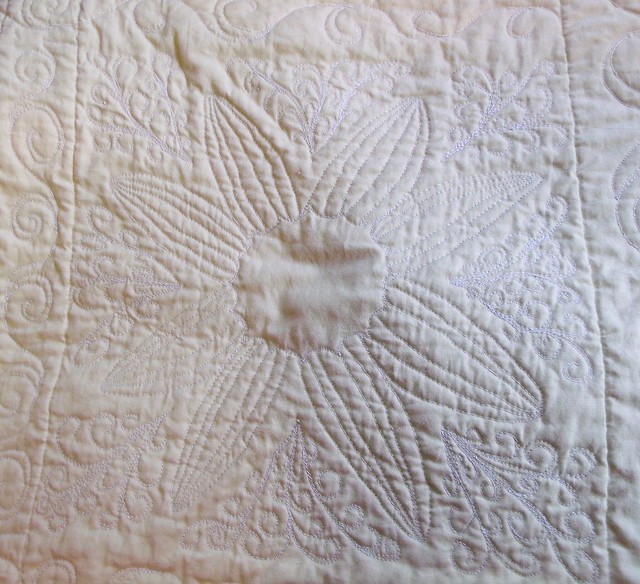
The back of the quilt is, for the most part, not all that pretty. Next time I’m going to use a lighter weight thread on the back and see if that helps.
The apple cores that didn’t quite want to lay flat? Yeah, that didn’t really quilt out.
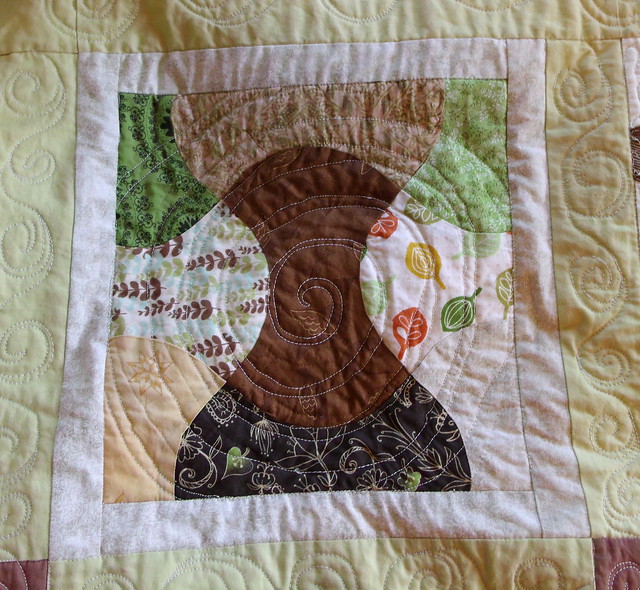
But on the whole, things came out a lot better than I’d hoped for, even though there are a lot of mistakes and little weird bits if you look closely.
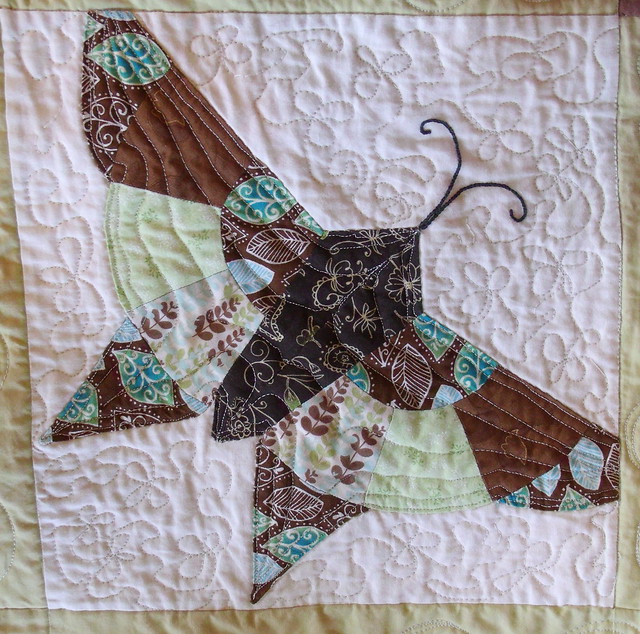
I love the butterfly, but I’m afraid it might be the winner of the “Most Likely To Need Re-Quilted After a Trip Through the Wash” award. The back is a bit eyelash-y, and I decided not to rip it.
And sometime? I really want to do a string quilt. (Oops. Missed a bit of quilting near the center, didn’t I?)

Resources Used
Here’s some of the stuff I couldn’t have made this quilt without. I’m sure I’m forgetting things — the other day while in the car I remembered at least three web sites I wanted to list and have no recollection of what they are now — but hopefully this is most of it.
- We Can Do It! Skill Builder Sampler series at Sewn by Leila
- Skill Builder Series by Piecemeal Quilts and Grey Cat Quilts
- Jaye’s chunking tutorial (and Jaye also has a whole bunch of other excellent tutorials
- Jaybird Quilts binding tutorials
- Sharon Schamber’s thread basting videos: Part 1, Part 2, newer video in HD
- First Steps to Free Motion Quilting by Christina Cameli
- Craftsy classes:
Quilting Big Projects on a Small Machine with Ann Petersen
Free Motion Quilting a Sampler with Leah Day - Leah Day’s Free Motion Quilting Project

