I first saw one of these nifty hanging thread catcher bag/pincushion combo things at Whipstitch a while back, and I became sort of obsessed with making one. Seriously, how awesome are those things? Since then I've seen them all over, and one of the first things I did after I finished the sampler quilt was make one.
Now, I didn’t precisely need a new thread catcher. Last year I made this embroidered thread catcher bag:
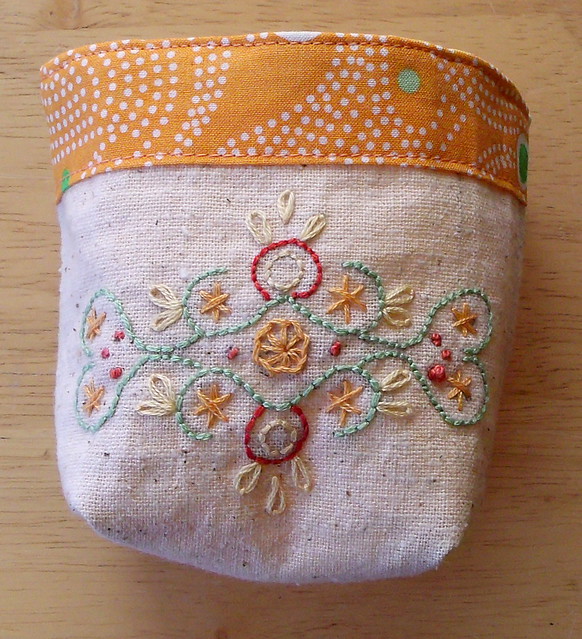
I still have it and I still love it, but unfortunately I didn't give even the tiniest bit of thought to interfacing, so it's gotten sort of saggy. It's also a little small — turns out I underestimated the amount of opening space I needed to have available to fling thread snippets at. So I've repurposed that one, and it's now holding the couple of medication bottles that are normally strewn about my desk looking all classy and stuff. Things are neater, I'm still using my happy little embroidered bag (just as a basket now instead) and it stands up much better with something solid inside it. When I was using it for thread, it was slouched all over the place.
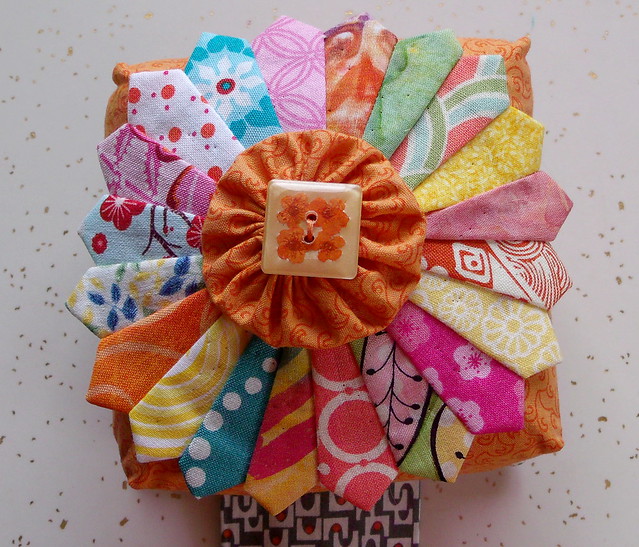
For the new one, I went with this pattern: dreamy Dresden thread catcher from Curry Bungalow on Etsy, which is a different pattern by the designer of the one I saw on Whipstitch. The pincushion on this one has a tiny Dresden plate, and I love it to death.
That was my first experience with a Dresden plate. Now, I think I might have mentioned in the last entry that I'd been pretty sick recently. (I promise this is relevant.) I actually ended up in the ER late one night with a bad asthma attack and a case of bronchitis. I left there quite a few hours later feeling much better and with a handful of prescriptions, one of them for some very strong cough syrup. Let me just tell you right now that you don't want to make your first Dresden plate while you're taking the very strong cough syrup. The first try didn't go so well. Before sewing it, I decided that the quarter inch seam line on my sewing machine (which I have marked with a stack of painter's tape) looked like it was in the wrong place. And I moved it over, with the result that all my seam allowances were a little too big and the thing would never have made a full ring.
After I was off the cough syrup, I moved the seam line back to its original place and got back to work, and things went much better.
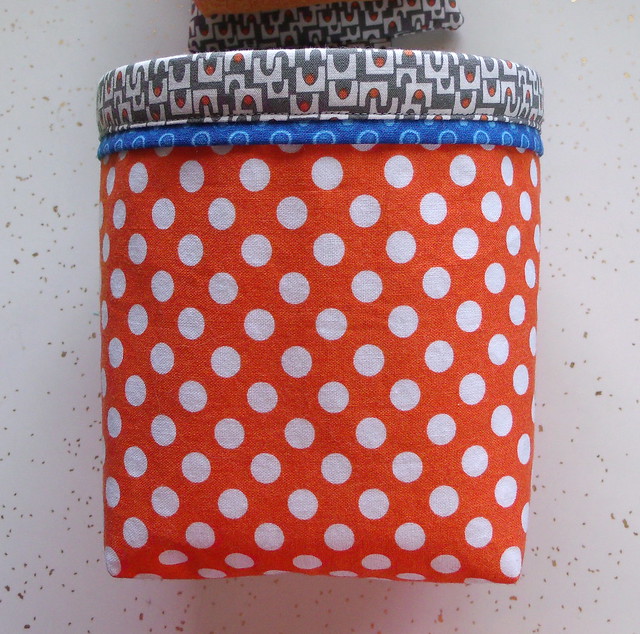
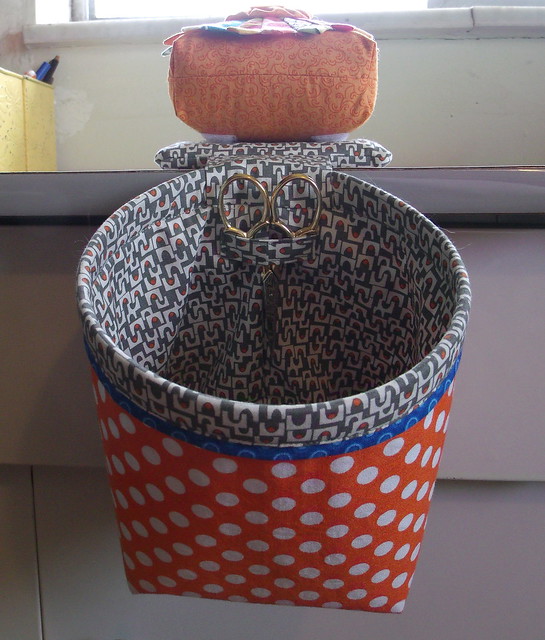
The bag part looks like so:
I was a little hesitant to use that blue contrast strip, not being sure whether it would turn out pleasantly contrast-y or too clashy. But I like it a lot.
The bag stays round at the top by means of a strip of Rigilene boning, which I thought was incredibly clever. I happened to have part of a roll of Rigilene left over from an old project, so I was happy to be able to finally use some of that up. The designer sells supply kits for these so you don't need to source your own boning and tile and walnut hulls and rubberized shelf liner, but since I had the boning, tile, and shelf liner already, all I needed was to scrounge up some filler for the pincushion. I considered buying walnut hulls. The options on Etsy seemed mainly to be about 2 cups for $12 or so after adding in the shipping. I found out you can get ground walnut hulls at pet stores packaged as lizard bedding, and I checked out a local shop and found they did have it, but I'd have to buy a 10-quart bag for $15. I'll probably do that eventually, but for this one I ended up scavenging the sawdust filling from my old and extremely beat-up tomato pincushion and packed the top half of the pincushion with that, then filled the bottom with polyfill. It attaches to the fabric-covered tile with velcro, so no worries about it being lighter weight due to the polyfill. (I've learned that a pincushion stuffed only with polyfill is too light for me and will end up on the floor every two minutes — but even with half-polyfill, this one is pretty solid.)
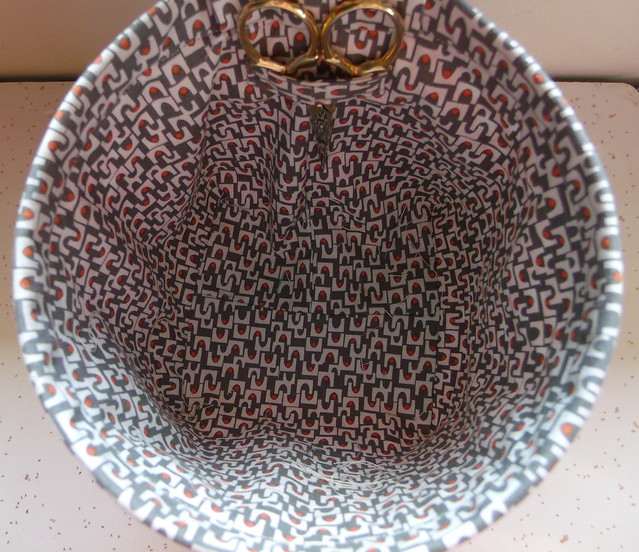
I also love the lining fabric, which is MicroMod Arches. That whole fabric line just makes me happy, and I particularly love the tiny orange dots mixed in with the gray in this one.
The part that didn't work out so well was boxing the corners on the pincushion and lining. Of the three ways this page shows for boxing corners, I usually do it the third way shown, by lining things up, sewing the seam, and then cutting the corner. The pattern shows the second method (cutting the little box out and then lining up the seam and sewing) which I'd been wanting to try to see if it was less fussy. I didn't have any trouble with the outer bag, but for some reason on the pincushion, and on the bag lining to a lesser degree, I had a really tough time keeping the edges lined up, even after pinning, and I ended up sewing a little bit of a smile shape rather than a straight line. The lining only has minor weirdness, but the pincushion corners are a little odd-looking. You can particularly see it on the right side of the pincushion in the photo above. I decided I could live with it, though. I think the flower distracts attention enough that it's not a big enough deal to bother me any.
I've been using it for a few days now, and I'm really glad I made it. No more finding bits of thread all over the desk and the floor because I missed the opening on the smaller one (which I need to be especially careful of because I have cats, and one of them in particular likes to eat inappropriate objects as a hobby) and it makes me happy just looking at it.


June 18, 2014
God bless you, woman. And I bet you didn’t whine for a second while you were making this! I really got a kick out of your experience trying to sew while on prescription cough syrup. Have you heard the story of my “Cautionary Tale” quilt? Sigh. (Also bronchitis. Also should’ve known better than to get near a sewing machine.) In any case, your pincushion is absolutely gorgeous. Great job–and I bet you grin every time you get to use it!
June 21, 2014
Oh, I whined a little bit during the Dresden plate part! :D I still can’t believe I moved my quarter-inch guide, which has been in the same place for ages, just because it sort of looked wrong. I just queued up the two podcast episodes you mentioned in that Cautionary Tale quilt post to listen to the whole story and everyone else’s — maybe that’ll help next time I’m tempted to sew while confused again!
June 18, 2014
Haha! I’m so tickled to see your thread catcher! I was JUST thinking today how awesome it is, and how glad I am to have made it. When we (eventually/someday before I expire) finish the basement and create a larger/non-dining room sewing space for me, I plan to make two more: one for the cutting table and one for the serger. For the time being, I’m struggling through with just the original, but I tell you what: it is the bees knees. No idea how I got through before! Probably with a vastly higher degree of slovenliness. Love your version, and that blue contrast really POPS!
June 21, 2014
I can totally see making a second one sometime — I keep moving it back and forth from my cutting area to the machine. This thing is such a huge help, and I’m using it a lot more consistently than my little one, which always seemed to be in some random spot on the desk rather than where I needed it to be.